Guide forInventory and sales management →
Inventory
Browse, filter and update your stock in Retailed, one unit per row, with cost, value and estimated profit.
The Inventory page lists every unit you own. Each pair of shoes, each hoodie and each booster box is its own row, so two pairs of the same sneaker in size 42 are two rows with their own cost and status.
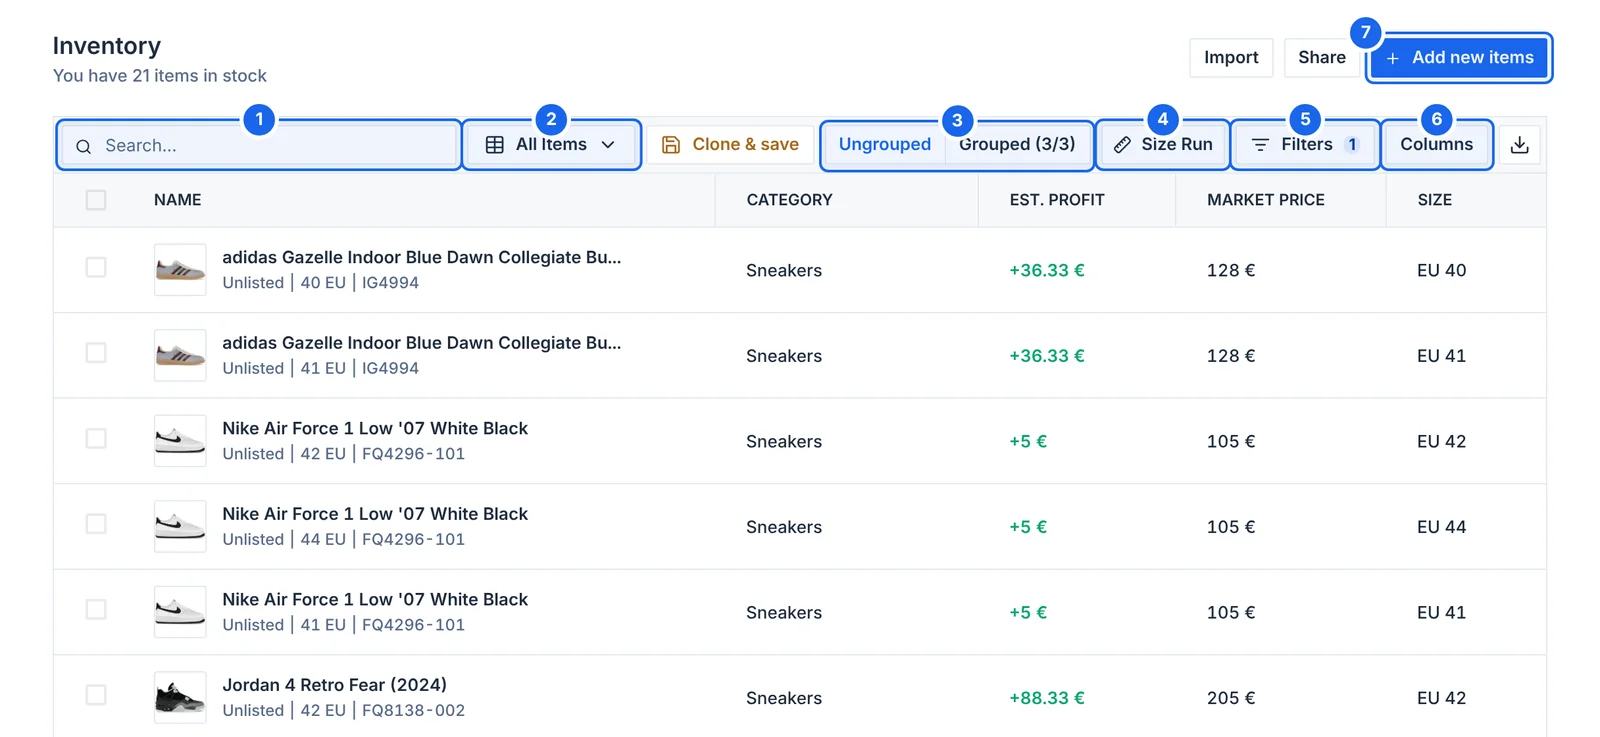
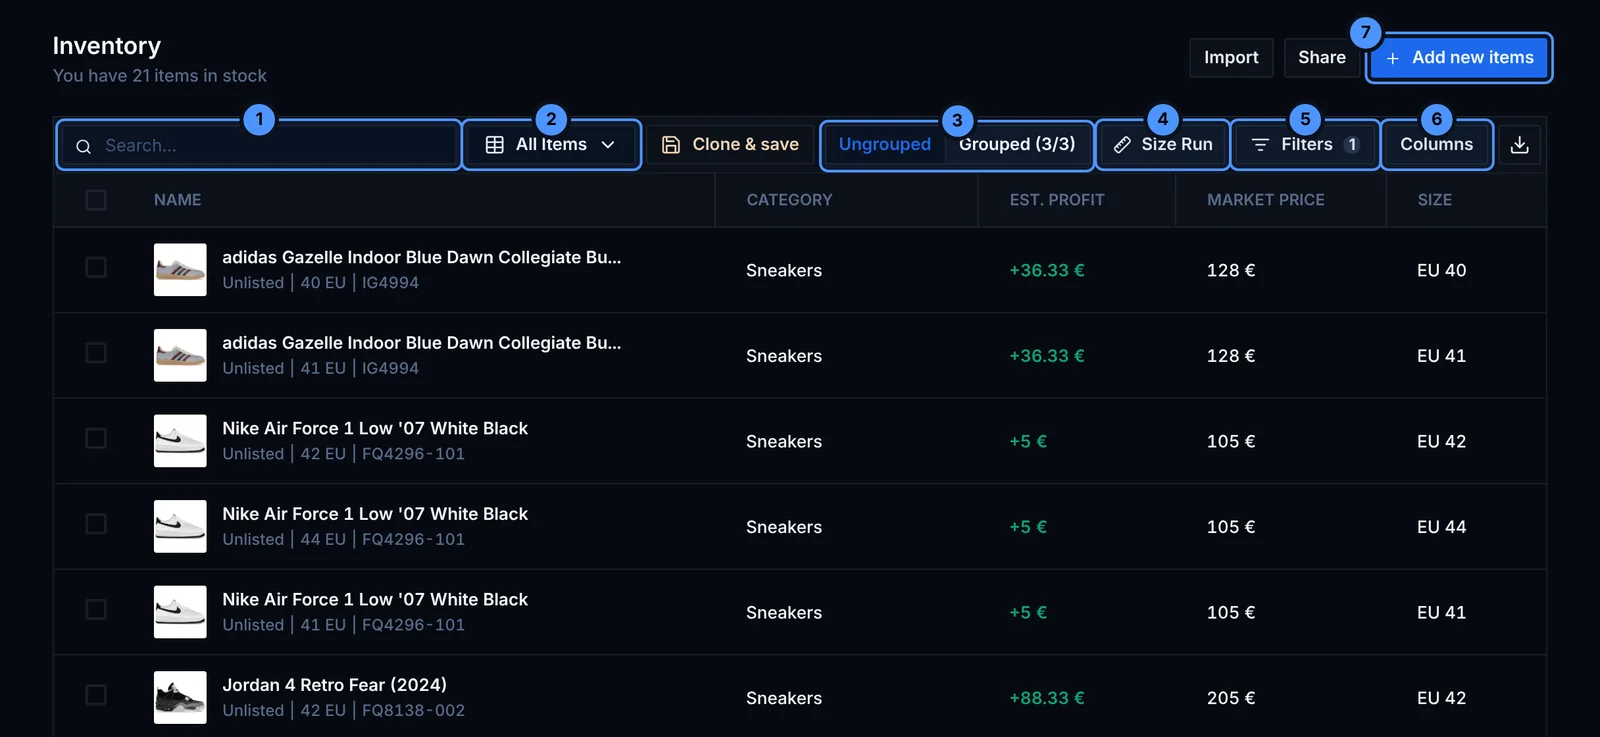
- Search by name, reference (SKU) or internal SKU.
- Views: switch between saved views, or save the current filters as a new one.
- Ungrouped / Grouped: one row per unit, or one row per product with its units inside.
- Size Run: see how many units you hold in each size.
- Filters: narrow the list by status, category, size, date and more. The badge shows how many are on.
- Columns: choose which columns to show and in what order.
- Add new items: open the create panel (see Add items).
Statuses
| Status | Meaning |
|---|---|
| Unlisted | In stock, not for sale yet |
| Listed | Listed on at least one platform (see Listings) |
| Sold | Sold, waiting for the payout |
| Paid | Sold and paid out |
| Deleted | Removed from stock, kept for your history |
When you mark a listed item as Sold, Retailed asks which listing sold, so the others can be closed.
Find items fast
- Search by name, reference (SKU) or internal SKU.
- Filters narrow the list by status, category, brand, size, tags, dates and prices. Filters are kept in the page address, so you can bookmark a filtered list.
- Views: save your filters and columns as a named view (for example "Unlisted sneakers") and switch views from the All items menu.
- Columns lets you show, hide and reorder columns such as market price, estimated profit, purchase date or place of purchase.
- Grouped puts identical products together so you can expand a product and see each size.
Work on many items at once
Tick rows (or hold Shift for a range and Ctrl for single rows). A bar appears at the bottom of the page.


- The spend, value, estimated profit and ROI of your selection.
- Mark as Listed, Unlisted or Paid in one click.
- Actions for every selected item:
- Edit a field on every selected item (bulk edit)
- Refresh market prices (see Market prices)
- Create sales or Create listings for all of them at once
- delete them
Right-click a row for the same actions on a single item.
The item page
Click an item to open its page.
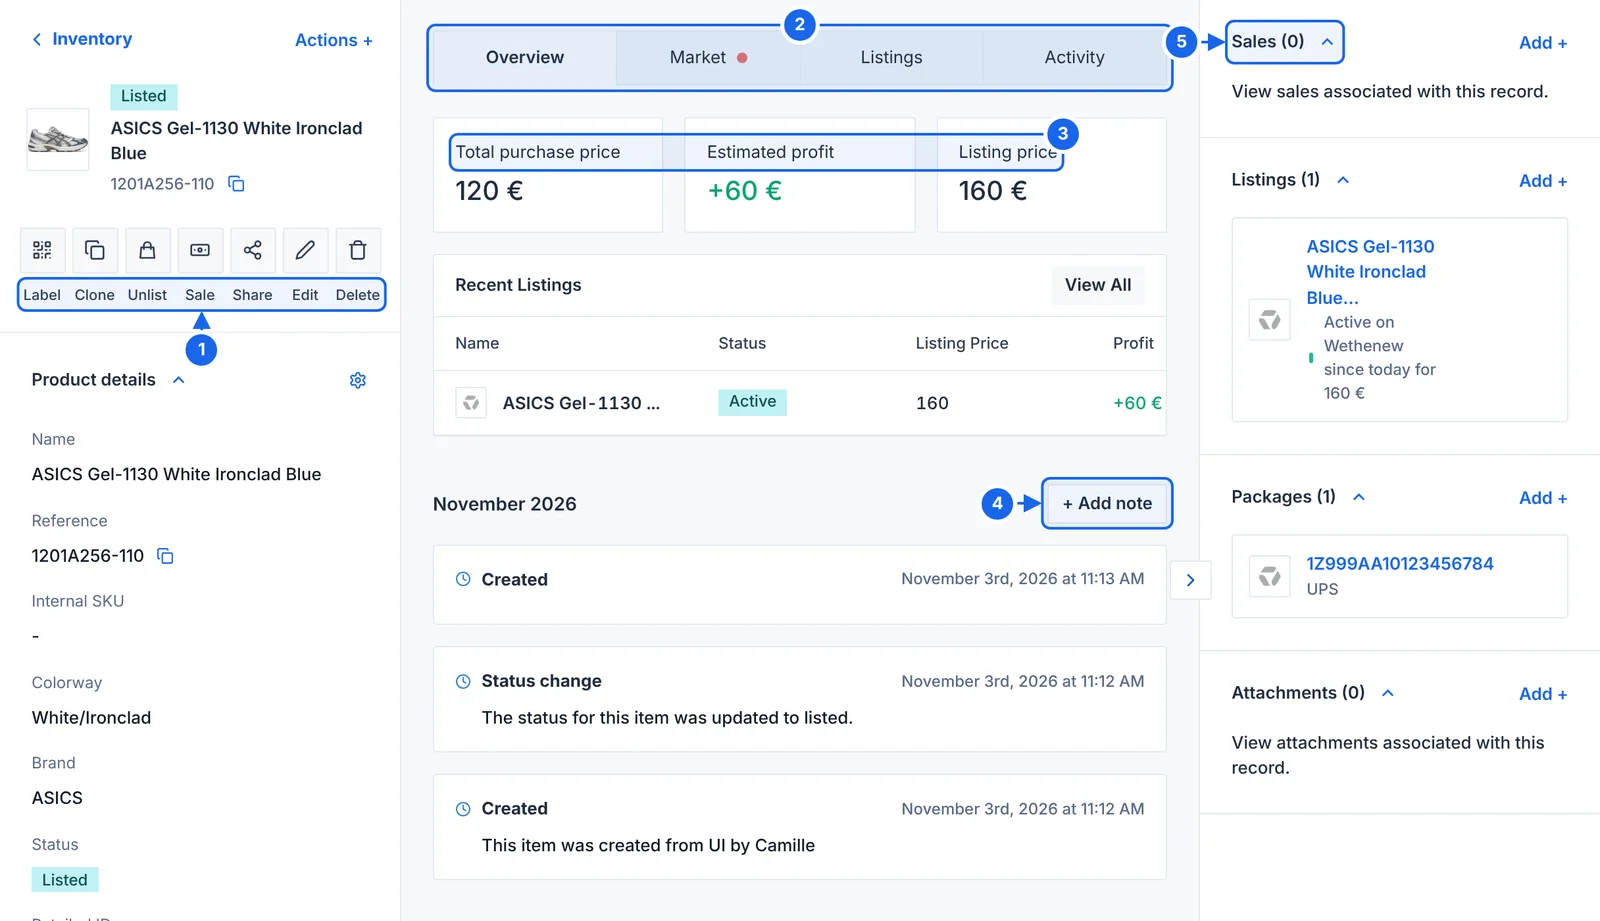
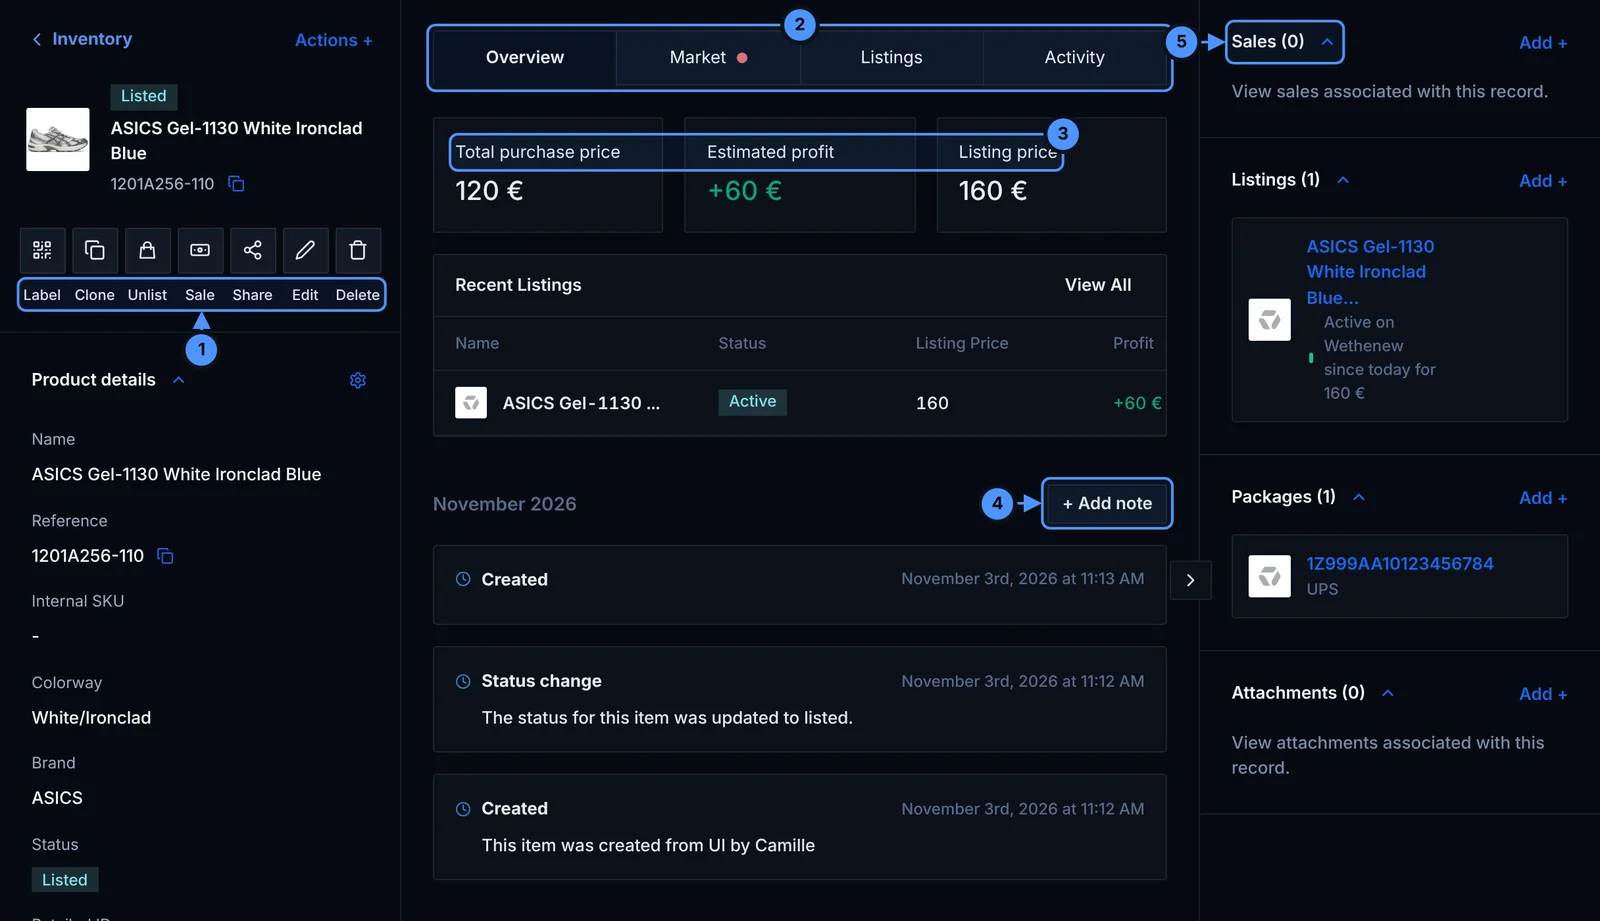
- Quick actions: print a QR Label (Warehouse plan), Clone, Unlist, record a Sale, Share, Edit or Delete.
- The tabs, described below.
- What you paid, the estimated profit and the current listing price.
- Add note writes a note into the item's timeline.
- Linked sales, listings, packages and attachments. Click Add + to link one.
The tabs:
- Overview: total purchase price, estimated profit and listing price
- Market: the price trend for that size (see Market prices)
- Listings: where the item is listed
- Activity: a timeline of every change, with your own notes
Attach files such as receipts in the Attachments section on the right.
Custom properties
If you need fields Retailed doesn't have (condition, box state, storage shelf), create them in Settings › Properties. Group them, choose their type, and they appear on every item page.